Rain Barrel – Homemade #3
Grant P. went all out with his design:
I thought I’d send you a refined rain barrel design I worked out. I looked at your web site, and a few more, and then I made some changes and came up with the attached. All parts are readily available at the home improvement centers, I put in 7 at my house, and they are working great. I probably made it too hard, but my background as an engineer caught up with me as I went along!
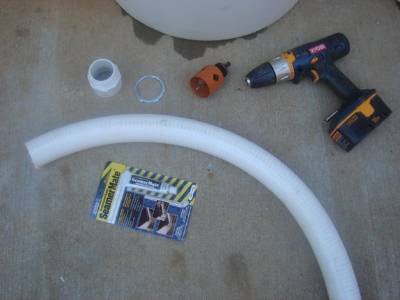
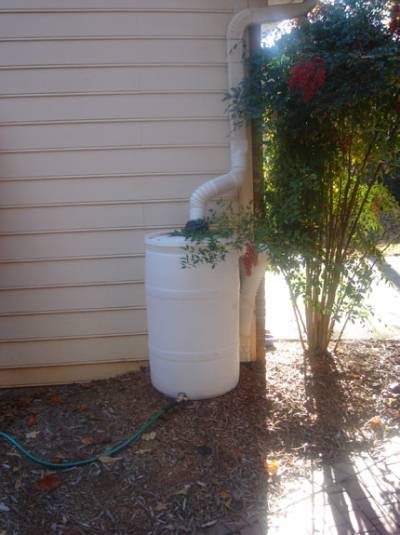
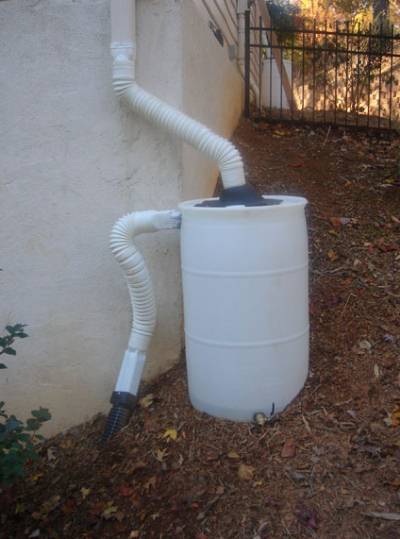
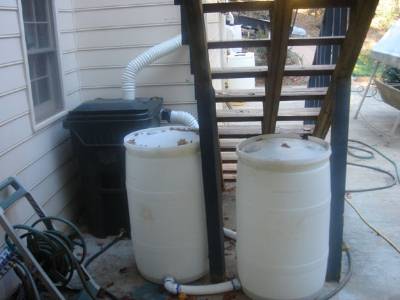
Attached are pictures of the water tank parts and setup I worked out. Some of the parts are in the plumbing fittings section of Lowes, and some are in the roofing/gutter section, and some are in the outside garden area where the corrugated drain pipe is.
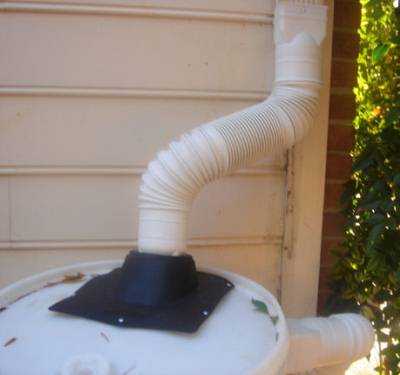
The two pieces of flex gutter pipe are for the tank input and the tank overflow output. One flex piece is connected (with screws to hold it) from the gutter coming down from the side of the house, which I cut a section out of, to the tank input. The other piece of flex goes from the tank overflow output to the gutter drain pipe going into the ground. Keep in mind that all gutter interfaces, going in the direction of flow of water, need to go from a smaller pipe fitting into a larger pipe (or else be a watertight fitting).
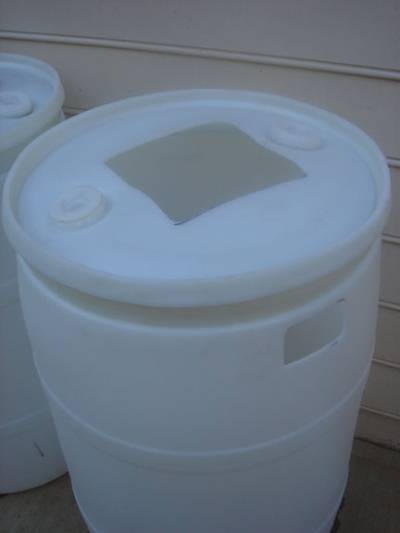
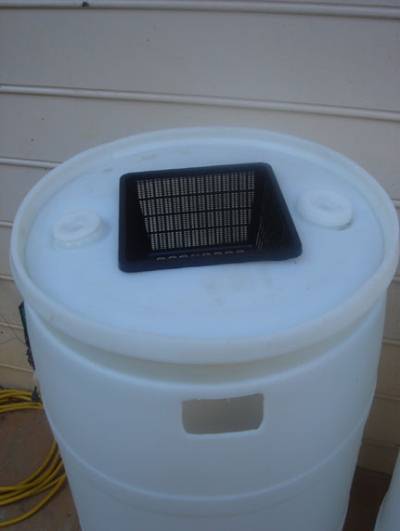
For the tank input, cut a square hole in the top of the tank, just the size to catch the lip of the square mesh box in the photo. This mesh box is a water plant pot, which can be found in the water garden section of Lowes. This hole also allows your arm access to the inside of the tank for working the fittings. To connect the flex downspout to the mesh box hole, in one case I just used a piece of sheet rubber fitted to the downspout, and the sheet screwed to the top of the tank over the mesh box, with a small rectangular hole cut in the sheet for the flex downspout. Then I found some cheap roof vent pipe plastic/rubber flashing in the roofing section of Lowes (see picture), and I found that if you cut the round rubber part of the flashing to a rectangular hole a bit smaller than the flex gutter pipe, it makes a great rain barrel input cover.
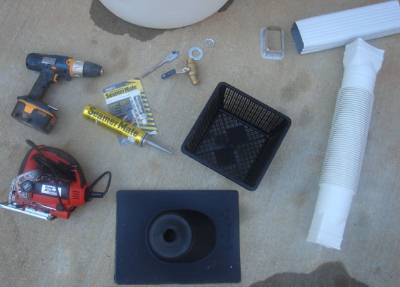
For the tank overflow output, you cut a small rectangular hole in the top side of the tank as high as you can go, and insert the sheet metal gutter flange you see in the photo. You use the gutter sealer you see in the photo to seal the flange to the tank when you insert it, securing it with the sheet metal screws. You could also use a good outdoor caulk, but this sealer worked the best by far of the 4 I tried -you need it to dry mechanically strong as well as sealing. Then, you secure the flex pipe to the flange with screws, sealing that with the gutter sealer in the process. The lower end of the flex pipe you insert into the gutter drain pipe going into the ground. You bend in the edges of the metal gutter pipe to fit the flex pipe. In some cases I used a short piece of aluminum gutter pipe as a tighter interface between the flex pipe and its interface.
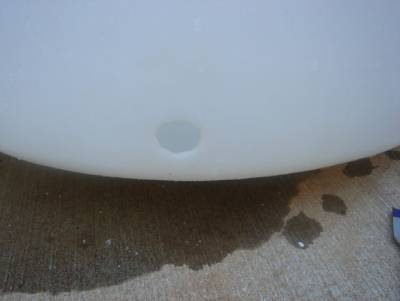
For the water tap spigot, use the three-quarter inch threaded brass hose bib shown in the photo. Note that it is a ball valve hose bib, so you get a full water flow when open -this works a lot better than the standard home knob hose bib which greatly restricts water flow (you might be hooking a pump on there). I just drilled an appropriate hole in the plastic tank, and then self-tapped threads in the tank hole with the brass hose bib (pause and back up occasionally as you do this). Then you take the hose bib out, put a close fitting steel washer on it (to give the sealer some surface to work on), put the gutter sealer on the threads, and screw it into the tank (almost tight, but a thread or so loose to give room for the sealer). An option would be to put a flange nut on the hose bib threads on the inside of the tank for strength. This flange nut you find in the electric conduit section of Lowes (see picture). However, I did not do this, and I had no problems, as the barrels I used were fairly thick, and the threaded hole was fairly strong along with the sealer, which is a good adhesive too (if you want to put the nut on, you will have to deal with the fact that the barrel is deeper than your arm is long).
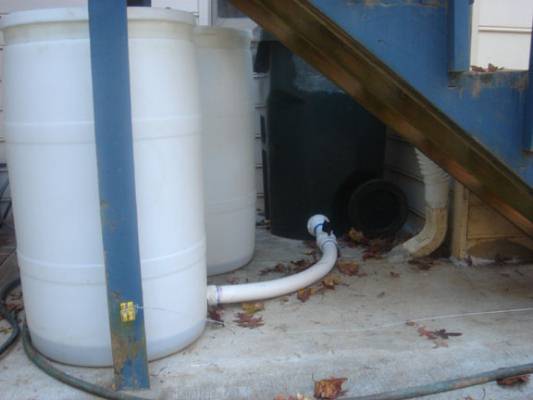
Then, if you desire to hook two or more tanks together to increase capacity, use the 2 inch PVC schedule 40 male-pipe-thread–to-female-solvent adapters (see picture) at the bottom side of both tanks, and connect the tanks with 2″ PVC pipe. Flex PVC (the heavy solvent-connect type) would be best, but you can use the cheaper schedule 40 pipe too for a rigid connection (or other flex options). First you drill the holes for the 2 inch adapters with a drill and hole saw (see picture), and then you need to cut threads in the holes for the 2 inch adapters, and then just put the gutter sealer on the adapter threads and screw them in, and solvent-glue the PVC pipe on after the sealer hardens. For cutting the threads in the plastic barrel, I just used a piece of 2 inch steel plumbing pipe, with a cap on it for handling (again, pause and back up occasionally when cutting the threads). Remember that the second (or third, etc.) tank doesn’t need any more fittings, or a large top hole, but it must be vented somehow -a screen flap over the threaded bung-hole the barrel comes with works fine. In the example picture of one of my 3-barrel rigs, I have an 80 gallon garbage can for the main tank, and two of the 60 gallon food grade barrels connected to it. In that case, I used a 2 inch ball valve off the main garbage can tank so I could isolate the water in the two supplementary barrels (just an option to consider).


-

-
-
1

Rose stem canker
-
2

Dog Vomit Fungus
-
3

How to Soil Test
-
4

Peach has black spots on skin, scab disease
-
5

Boxelder Bug vs Red-Shouldered Bug – Identification
-
1

What To Do About Camellia Leaf Gall
-
2

Boxwood Blight – Replace Boxwoods with Holly
-
3

Spider Mites – On Citrus (Orange)
-
4

Woolly Bear Caterpillar – Predicting Winter Weather
-
5

Hydrangeas – Keeping their true color
-


