Thermal Blue – Installation Photos
It’s not often that we get to see the process of renovating a home lawn from start to finish. A garden friend recently sent these shots. See his notes at the end too:
———————
Walter – I completely renovated my lawn in August of 2005 with sodded Thermal Blue bluegrass and thought you’d like to see the results. You have my permission to use my photos.
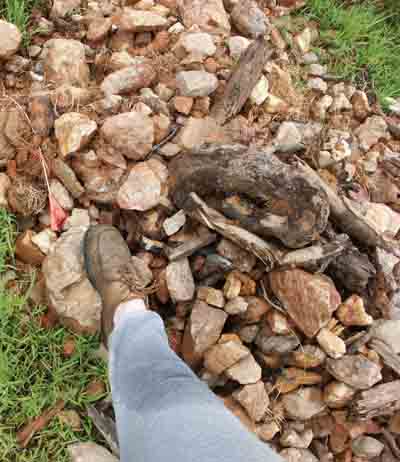
Removed the rocks (this is 1 of 4 piles)
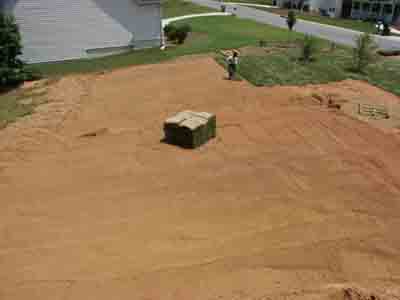
Prepared the dirt (NO TOPSOIL…just tilled) and installed the sod
This is the sod after install on August 8th, 2005
Same yard 2 weeks later
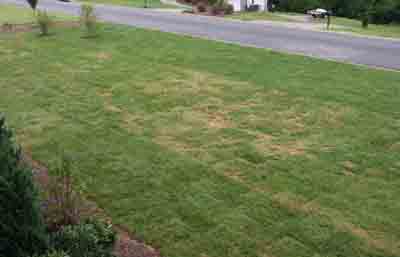
Three months later on November 3rd 2005 with my neighbor’s bermudagrass for contrast
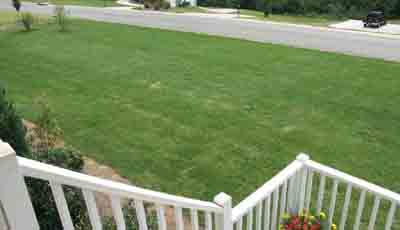
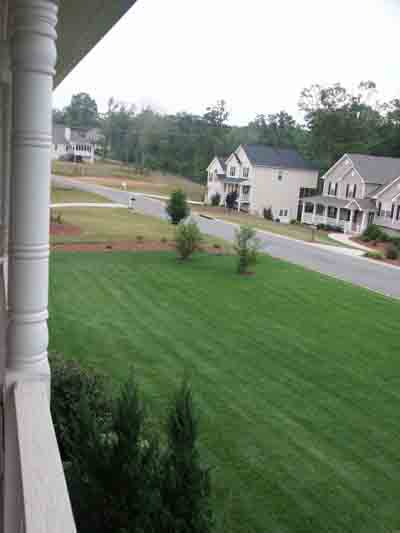
Picture from my porch looking the other direction May 17th 2006.

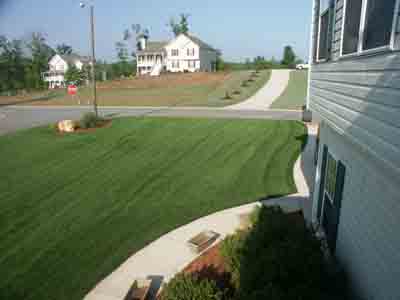
June 22nd 2006…still not a year old…after fully filling in rough spots…99% weed free….this is during a drought.
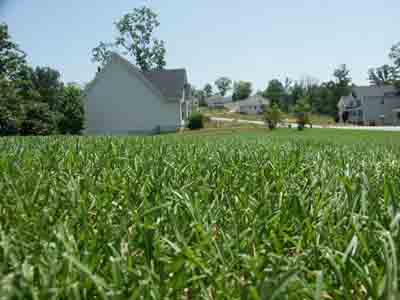
A close up of the same grass with the leaves starting to fold slightly. I watered on this day
What I would advise to anyone who wants to try this grass.
• Do not treat this grass like a cool season grass that has a little extra heat tolerance! That is what most people who are having problems with this grass are doing to create the problems. Treat it like a warm season grass and it looks great!
• Fertilize it with 6-8 lbs of nitrogen per 1000 square feet per year (not 3-4lbs like typical cool season grasses)…including during the summer months. I recommend a 50 percent slow release during June/July/August only.
• Don’t water it unless absolutely necessary. The old test of walking across the lawn and seeing if footprints remain for several minutes works perfectly.
• Keep it simple and enjoy this new lawn grass.
-

-
-
1

Asian Ambrosia Beetle – Trap
-
2

Maintenance – African Violets
-
3
Transport Cuttings
-
4

Build a Really Raised Bed
-
5

Creeping Charlie vs Pennywort (Dollarweed) vs Dichondra – Identification
-
1
Creeping Charlie vs Pennywort (Dollarweed) vs Dichondra – Identification
-
2
Hibiscus – Winter care
-
3

Boxwood Turns Orange-Yellow in Winter
-
4

Sweetgum – Eliminating Balls
-
5
Maintenance – African Violets
-


